Delivering Digital Materials
Ad materials are delivered using ad links.
Links are sent to the material deliverer's e-mail once the ad booking has arrived.
Instructions for Ad Material Delivery
Step-by-step instructions for different ad material formats can be found below on this page.
Image file (jpg, gif, png)
The material link takes you to a website where you can deliver the ad material for your campaign. The link opens directly to the line item of the first publication day. If you are delivering material for a multimedia campaign, you will find separate line items for each media type. You will recognize the items by the material type in front of them (e.g., DIGITAL).
Once you have selected the publication day of your choice by clicking on the line item you want to deliver your material to, follow the instructions below.


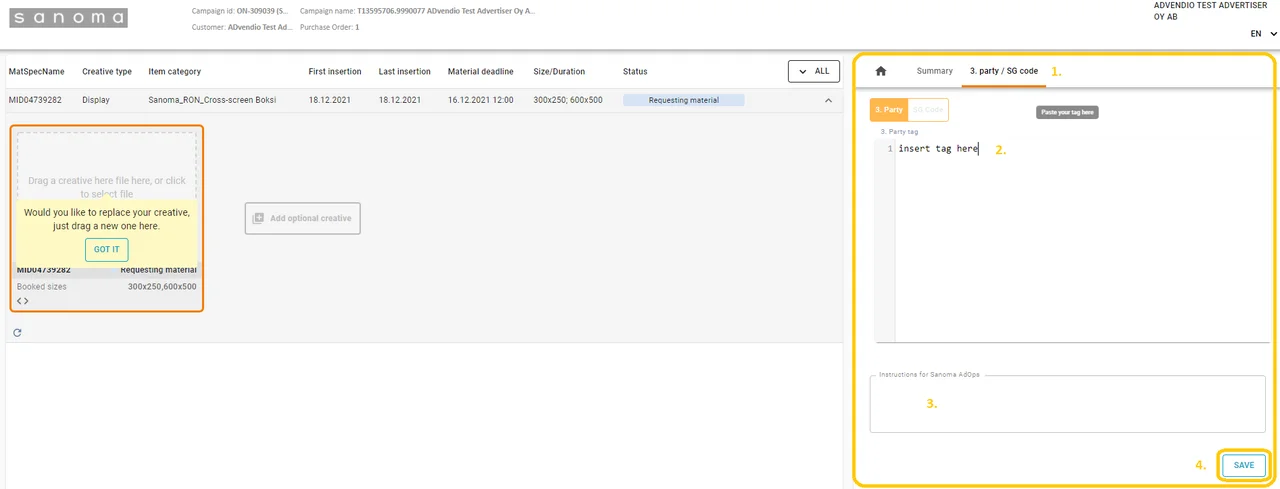
Tag material
The material link takes you to a website where you can deliver the ad material for your campaign. The link opens directly to the line item of the first publication day. If you are delivering material for a multimedia campaign, you will find separate line items for each media type. You will recognize the items by the material type in front of them (e.g., DIGITAL).
Once you have selected the publication day of your choice by clicking on the line item you want to deliver your material to, follow the instructions below.

HTML5 material
The material link takes you to a website where you can deliver the ad material for your campaign. The link opens directly to the right material tab. If you are delivering material for a multimedia campaign, you can find the line items of each media type in their own tabs. You will recognize the items by the identifier in front of them (e.g., DIGITAL).
Delivering additional material

Exchanging the creative
If necessary, you can exchange the campaign material via the upload page.
Please note that if Sanoma has already processed a print campaign, you cannot exchange the ad directly on the upload page. In this case, please contact Sanoma’s print traffic, tel. +358 40 151 1942.


Previous material is used in the campaign
Once you have selected the publication day of your choice by clicking on the line item you want to deliver your material to, follow the instructions below.